How to Build a Stage
Method 1a: No Foundation
This is a variation on the partial foundation where we use a single foundation block as a level reference but in the end have no foundation at all. This same technique works for building foundations for regular houses.
Step 1: A single foundation block
 Looks kinda lonely, dudn't it?
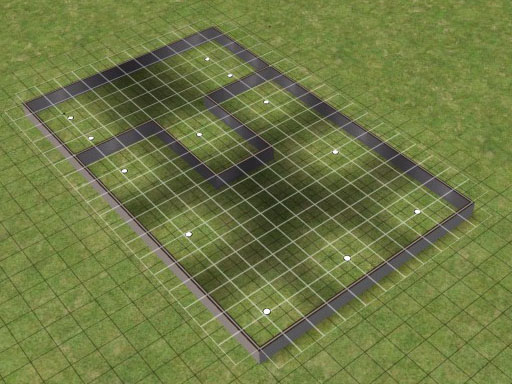
Step 2: Lay out some walls
Looks kinda lonely, dudn't it?
Step 2: Lay out some walls
 Add some walls to keep the foundation block company.
The closest wall needs to be within 3 squares of the foundation block because we're going to bridge the gap with floor tiles.
In the image above, I left out some wall sections to let in light. Let's finish off our wall layout and toss in some lights so we can see what's going on.
 Added runway and closed it up. Lights let us see what's going on.
If you want to add lights while you're building, you'll need a sim to turn them on; so this only works on an occupied residential lot. Fortunately, Tabitha is still here and doesn't mind that she has to keep running over to flip the circuit breakers.
Step 3: Flatten the walls
 Use flooring to flatten the walls to the level of the foundation block.
You need
boolprop constrainfloorelevation false for this.
Start with your floor tile on the block and sweep it to the walls. Then work your way around, flattening all the walls.
You don't have to finish off the floor; we're going to delete it anyway. Just make sure you've flattened all the walls.
Step 4: Delete the floor
 We're done with that floor, so delete it.
Once all the walls are level with the foundation block, we can delete them.
Now turn off the code:
boolprop constrainfloorelevation false
Step 5: Delete the foundation block
 Delete the foundation block
We don't need that lonely little foundation block any more so we'll send it back to play with its friends.
If you neglected to turn
constrainfloorelevation code off, nearby walls might pop back up to their original height. If that happens, just undo and try again.
Step 6: Floor the stage
 Add a floor to the stage
Now's a good time to put some flooring on the top of the stage.
I had to delete the lights under the stage before the game would let me floor right above them.
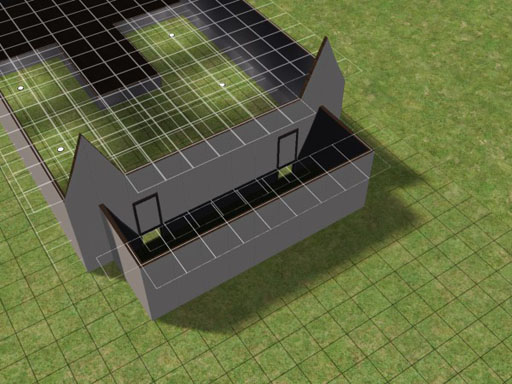
Step 7: Add walls
 This joint needs some walls.
We're not building an outdoor theater here, so add a level of walls.
Step 8: Doors
 Uh oh! Our doors are messed up!
Look what happens when we try to add doors at ground level so that people can get into this place. The upper wall blocks most of the door!
We can fix that making the walls near the doors stretch back to their full height. Set
boolprop constrainfloorelevation true to do this.
 Some more walls give us a reference level.
Running some new ground-level walls right up to a spot near the doors makes them stretch back up to match.
(Another way to do this is to put in a garage door and then remove it once you've got the wall height fixed.)
 Again, flooring levels the tops of the walls
.
Here again, I used flooring to make the tops of the walls line up in this section of the building. Our doors are finally clear!
Step 9: Level off the upper walls
 Floor tiles leveled the top of the walls
Once I had the doors clear, I went up a level and used floor tiles to bring the upper walls down so that I'm ready to build a nice flat roof.
Now you can set
boolprop constrainfloorelevation false.
(If I'd wanted to leave the roof raised like a billboard, I could have used floor tiles to roof over the building before I added those extra walls in step 8.)
At this point, I could have deleted the walls that I used to stretch the walls near the door, but I liked them so I kept them. They form a nice front entrance to this little showroom.
Step 10: Finish off the building.
 The Brick Striphouse
Here's the finished building. It still needs quite a bit of outfitting to make it a viable show place, but the complicated bits are all done.
Back in Step 9, I added a stage door and steps up to it so that the sims could get to it. And speaking of which, here she is!
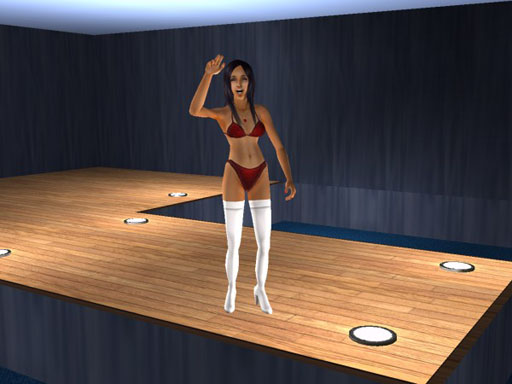 The Blue Room at The Brick Striphouse received Tabitha's stamp of approval.
But she was still campaigning for the addition of bathrooms.
The Blue Room at The Brick Striphouse received Tabitha's stamp of approval.
But she was still campaigning for the addition of bathrooms.